If you’re new to glamping, it’s easy to fall for gorgeous photos and glowing reviews, then arrive to find the site doesn’t match your season, budget or comfort expectations. Learning how to choose a glamping site before you book saves you from that disappointment. The difference between a great first trip and a wasted weekend usually comes down to a handful of practical checks: the right tent style for your travel dates, a price you can actually afford, and facilities that match what you need to sleep well.
This guide walks you through each of those checks step by step. We’ll help you figure out which glamping style suits your first trip, pick the right season and weather window, and set a realistic budget so nothing surprises you at checkout. You’ll also learn how to judge a location’s driving distance, compare comfort levels and facilities, and time your booking with a sensible cancellation strategy. By the end, you’ll be able to shortlist sites with confidence instead of guessing.
What Glamping Style Suits Your First Trip
Your first decision is the stay type itself, because it shapes everything else: comfort, price and the overall feel of the trip. The main options you’ll come across are safari tents, geodesic domes, treehouses, yurts and cabins. Each one sits at a different point on the spectrum from “close to camping” to “basically a boutique hotel in the woods.”
Safari tents and yurts are the classic glamping image: canvas walls, wooden frames, real beds and usually a deck outside. They feel wonderfully close to nature, and in warm, dry weather they’re hard to beat. The trade-off is that canvas breathes, moves in the wind and offers limited insulation, so these structures suit warm, dry months best. If you want a first trip with a genuine under-canvas feel and milder prices, this is where most beginners are happiest.
When cold weather is on the menu
If your trip falls outside the warm season, narrow your search to insulated domes and cabins. Basic canvas simply isn’t built for cold nights, so don’t book a tent-style unit and hope for the best. Geodesic domes with proper insulation, or solid cabins with heating, are the reliable cold-weather options, and many sites run them year-round.
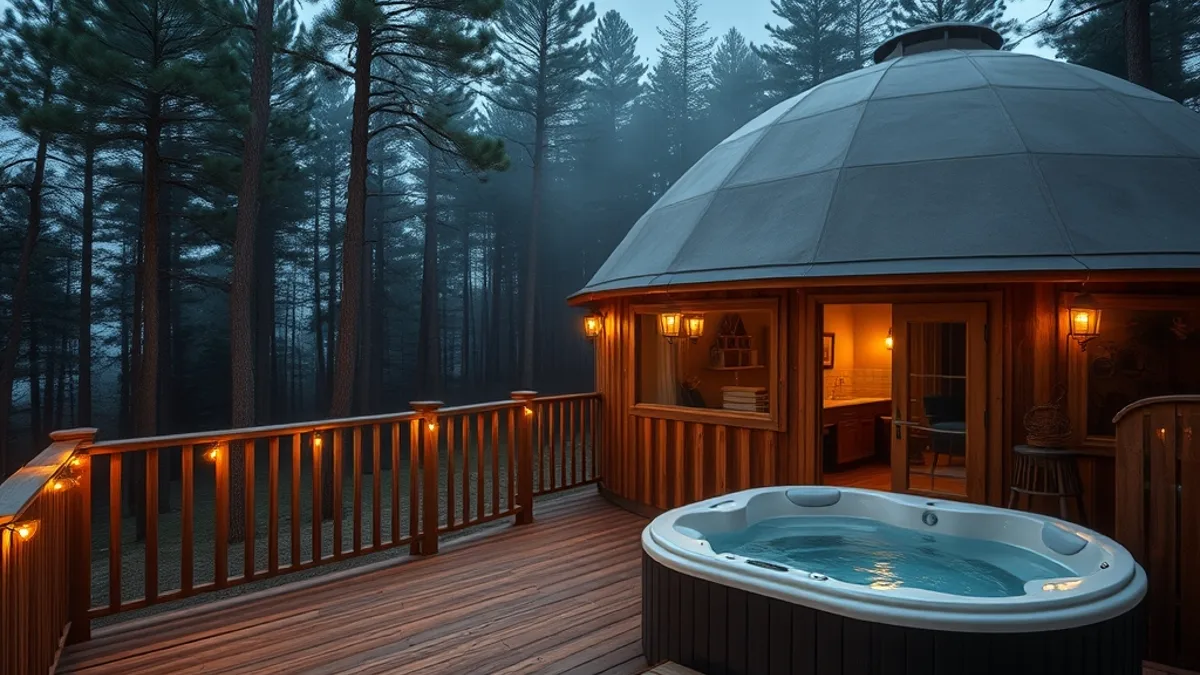
Then there’s the wow factor. Treehouses and domes are the styles that make people gasp when they walk in: curved windows, canopy views, that floating-in-the-trees sensation. They photograph beautifully and make the trip feel like an event, which is exactly why many first-timers pick them. Just know that this drama usually comes at a premium, so expect them to sit at the top of a site’s price range.
A practical way to decide: if your priority is maximum atmosphere and photos you’ll still be sharing a year later, go for a dome or treehouse and accept the higher rate. If your priority is trying glamping affordably and comfortably in warm weather, a safari tent or yurt is the smarter first step. Cabins are the middle path, especially if your dates are flexible or the weather looks uncertain.
Picking the Right Season and Weather Window
Timing makes a bigger difference to your first glamping trip than almost any other decision. In most temperate regions, the peak season runs from June to September, when nights stay warm and the ground under your tent is far less likely to turn muddy. A canvas safari tent that feels charming on a dry July evening can feel damp and chilly after a week of spring rain.
If your dates are flexible, look at the shoulder season instead. May and late September often cut rates by 20-40%, and sites are noticeably quieter. The trade-off is cooler evenings and a higher chance of rain, so pack layers and check that your unit has decent heating before committing.
- Ask whether the tent has a proper floor or just groundsheet-style canvas — a raised wooden platform keeps you drier and warmer when the weather turns.
- Check the site’s cancellation window against your travel dates: shoulder-season trips are more likely to need a last-minute shift if a cold snap arrives.
- Look at sunrise and sunset times for your travel month, since short autumn days can cut your outdoor evenings and fire-pit time down considerably.
- Confirm whether communal areas like lounges or covered terraces stay usable in wet weather, not just the tent itself.
One hard rule for first-timers: avoid basic canvas sites outside the summer months unless the listing clearly states the units are insulated and winter-ready. Year-round glamping usually means domes or cabins, not thin canvas walls. If a site advertises “open all year” but shows a standard tent, ask directly how it handles frost and heavy rain before booking.
Setting a Realistic Glamping Budget
Glamping prices vary wildly, so set expectations before you start browsing. Entry-level tents typically run $100-200 per night, while luxury domes and lodges can cost $300-800+ per night or more. That top end can rival a boutique hotel, so decide early what “worth it” means to you.
Here’s the catch: two sites with the same nightly rate can end up costing very different amounts. Some hosts bundle breakfast, dinner, kayak rentals or wood-fired hot tubs into the price, while others bill each of these separately. Before comparing prices, read the inclusions list carefully and do a quick mental total for your actual stay, not just the headline rate.
Also budget for getting there. Remote sites rarely sit on public transport routes, so you’ll typically need a rental car, a taxi transfer or a shuttle arranged with the host. Ask about parking and road access when you book, and price the transfer into your total rather than treating it as an afterthought.
- Ask about extra-person and cleaning fees. Some hosts charge per additional guest or add a one-time cleaning or service fee at checkout, which can add a noticeable chunk to a short stay.
- Check whether firewood, propane or heating fuel costs extra. At sites with wood stoves or outdoor fire pits, fuel is sometimes sold on-site, and evenings can get chilly enough that you’ll want it.
- Look at the minimum stay requirement. Weekend bookings often require two or three nights, which effectively doubles or triples the cost of a “one-night” comparison.
- Set aside a small activity budget. Nearby guided hikes, boat rentals or local restaurants aren’t part of the site’s price, and having a rough figure in mind keeps the trip from feeling more expensive than planned.
How to Choose a Glamping Site Location
Location can make or break a first glamping trip. For your first time out, keep things simple and pick a site within 2-3 hours of an airport or major city. That short drive means a delayed flight or a wrong turn won’t derail your whole trip, and you can easily pop into town for supplies you forgot to pack.
Next, decide what kind of setting actually matters to you. Glamping works in wildly different landscapes, and the same dome by a lake feels completely different from one on a mountainside. Most booking platforms let you filter by setting, so use that filter before you fall in love with a tent that happens to be cheap and available.
Think about what you want to do outside the tent, too. Mountain regions like the Swiss Alps pair a glamping stay with hiking trails and scenic rail routes right on your doorstep, so you barely need a car once you arrive. A lakeside site, by contrast, trades dramatic peaks for swimming, kayaking and slow mornings by the water.
- Coastal sites often sit on exposed ground, so check whether the tent is sheltered from wind before booking.
- Forest settings give natural shade and privacy between units, but they can stay damp and muddy after rain.
- Check whether the last stretch of road is paved, gravel or dirt, since some remote sites require a high-clearance vehicle.
- Look at a map for the nearest grocery store or village restaurant, because a beautiful site with nothing within a 30-minute drive changes your meal planning.
Checking Comfort Levels and Facilities
When you browse glamping listings, photos can make even a cramped tent look spacious. The simplest filter is square footage: for two adults, look for a unit of at least 25-30 m2 with a private bathroom. Anything smaller often means you’ll be stepping over luggage, and a shared washblock down a dark path is a very different experience from an ensuite.
Don’t rely on photos alone. A picture of a plush duvet tells you nothing about whether the bed is a real mattress or a camping cot, and no image proves the shower has consistent hot water. Read the written description line by line, and message the host if a detail is missing.
- Heating: ask whether it’s a real heater with a thermostat, a small wood stove, or just an extra blanket — canvas tents cool fast at night even in summer.
- Wi-Fi and signal: if you need to check in with family or work a little, confirm the actual connection quality, not just the “Wi-Fi available” badge.
- Power supply: some units run on limited solar, so hair dryers or kettles may not be usable.
- Running water: verify whether the sink and shower are inside the unit or a short walk away.
Finally, filter reviews by recency and read them with intent. Search for mentions of cleanliness, noise from neighboring tents or nearby roads, and how the site handles heavy rain — soggy walkways, leaks, and flooded bathrooms are the most common first-timer complaints, and hosts who respond quickly to them are the ones worth booking.
Booking Timing and Cancellation Strategy
Glamping books up faster than most first-timers expect, especially since many sites only have a handful of units on the property. A small site with six domes can be fully committed months before the season starts, which means the travelers who plan ahead get the best units and the best rates, while everyone else fights over the leftovers. The good news is that a little timing strategy protects both your dates and your money, because weather-dependent trips often need to shift by a day or two, and the right booking terms make that painless. Here is how to approach booking and cancellation like a pro.
- Reserve 2-4 months ahead for summer weekends. Popular sites within easy reach of a city can sell out their best units well before the June to September season peaks, so locking in early gives you the pick of the inventory instead of whatever remains. Early bookers also tend to get first choice of orientation, like the dome facing the lake rather than the parking area.
- Book 6+ months out for peak holiday dates. Long holiday weekends and festive periods see demand from far more than just glampers, and small sites cannot add capacity, so early booking is often the only way in.
- Choose flexible or free-cancellation rates. A storm, a sick kid or a washed-out trail can force a date change, and a rigid prepaid rate turns that into a total loss. Paying slightly more for a flexible rate is usually cheaper than losing a full deposit, especially when the nightly rate is high.
- Message the host before you pay. Ask about access roads for your car, whether staff help carry luggage to remote units, and realistic arrival windows. Hosts who answer quickly and clearly tend to run better sites overall.
One final habit worth adopting: save the cancellation terms in writing, either as a screenshot of the listing or a copy of the host’s email reply. Verbal reassurances about “no problem changing dates” carry little weight if plans fall apart, while a written policy gives you something concrete to fall back on if you need to reschedule. It also helps to set a calendar reminder a week before the free-cancellation deadline, so a decision never sneaks up on you.
Your First Glamping Trip, Wrapped Up
Choosing your first glamping site comes down to a simple sequence. Match the stay type and season first, since a canvas tent that looks dreamy online can be miserable outside the June to September window. Then lock in a budget and a location that fits how far you are willing to travel.
Before paying, verify the comfort features that matter to you, from heating and real beds to a private bathroom, and book early with flexible terms so a rainy forecast does not cost you the trip. Follow these steps and your first glamping night should feel adventurous without the guesswork. If this guide helped you plan your trip, leave a comment or share it with a friend.