One of the great appeals of glamping is that the accommodation is taken care of: a proper bed, solid walls or canvas, and often lighting and heating already in place. Yet figuring out what to pack for a glamping trip still trips up plenty of travelers. Bring too little and a chilly evening can ruin the fun; bring too much and you are hauling a suitcase across a muddy field for no reason. The good news is that a smart, seasonal checklist keeps your bag light and your trip comfortable.
This guide walks you through the year-round essentials first, then breaks packing down by season, from spring and summer trips to cold-weather stays in autumn and winter. You will find a simple layering system for clothing, tips on booking timing and choosing your site before you pack, and a few habits that help you pack light without sacrificing comfort. Check the details of your specific site before you go, and you will be set.
What to Pack for a Glamping Trip: The Year-Round Essentials
Before you pack a single item, message your glamping site and ask exactly what comes with your accommodation. Most safari tents, domes and cabins include proper beds with bedding, towels and basic kitchenware, which means a sleeping bag is usually unnecessary bulk. If the tent has a stove or heater, extra blankets are typically provided too, so you can leave the bulky camping gear at home.
A few items earn their place in your bag in every season. Lighting matters more than first-timers expect: paths between tents are often unlit, and even en-suite tents benefit from a hands-free light for reading or late-night trips outside. Power and water are the other two constants, since outlets may be limited and tap water is not always drinkable at rural sites.
Luggage choice makes a surprising difference. A duffel or soft bag is far easier to maneuver along gravel paths, over thresholds and across grass than a wheeled hard suitcase, and it squashes more easily into limited storage space inside a tent.
Finally, build a small safety and care kit even for a two-night stay. Sites can be remote, and the nearest pharmacy may be a drive away.
- Headlamp or lantern: choose a headlamp with a red-light mode so you don’t blind your travel companions at night, plus a small lantern for the tent table.
- Portable power bank: bring one with enough capacity for several phone charges, since tent outlets can be limited or shared.
- Refillable water bottle: an insulated one doubles for hot drinks if your site provides boiled or filtered water.
- Small first-aid kit: include blister plasters, antiseptic wipes and any personal medication, as glamping still involves walking on uneven ground.
- Insect repellent and sunscreen: pack both even in cooler months, since sun and biting insects don’t follow the calendar exactly.
Spring Glamping Checklist (April-May)
Spring is the season where glamping packing gets tricky. April and May bring daytime temperatures of roughly 10-18°C, but the weather rarely holds still for long. A sunny afternoon can turn into a drizzle within an hour, and evenings often cool enough that you’ll want a hat and gloves even while sitting outside your tent.
The key is a waterproof shell over quick-dry layers. Skip the heavy winter gear, but don’t pack for summer either. A light rain jacket that packs down small earns its place in your bag, because showers in spring tend to be short but frequent. Quick-dry fabrics matter just as much: if your base layer gets soaked on a morning walk, you want it dry by dinner.
Ground conditions deserve special attention. Spring grass and trails stay muddy well into the day, and the paths between your tent and the bathroom can become slick after overnight rain. Waterproof hiking boots with decent grip will save you from cold, wet feet, and spare socks are the item most first-time spring glampers wish they had packed more of.
Evenings are the sneaky cold spot of the season. Once the sun drops, temperatures can still approach single digits, so bring a warm hat and gloves even if the forecast looks mild. You’ll use them around the fire pit more often than you expect.
- Waterproof shell jacket: Choose one with a hood that fits over a beanie and taped seams, since spring rain often arrives sideways rather than straight down.
- Quick-dry trousers: Jeans are the worst choice for spring; a pair of synthetic hiking pants dries overnight inside a heated tent and handles mud far better.
- Waterproof boots plus three pairs of socks: Rotate socks daily and stuff damp pairs near the tent stove or heater so you always start the morning with dry feet.
- Compact umbrella or packable rain poncho: Useful for short walks to shared facilities when putting on full rain gear feels like overkill.
- Thin liner gloves and a beanie: These take up almost no space and make evening fire-pit time comfortable when the temperature dips toward single digits.
- Sealed dry bag or zip pouches: Keep spare socks and electronics separate from muddy boots and wet rain layers in a soft bag.
Summer Glamping Checklist (June-September)
Summer is peak glamping season in Europe, and long daylight hours mean you will spend more time outside than on any other trip of the year. That makes sun protection a genuine packing priority rather than an afterthought. Choose a breathable base layer in merino or a light synthetic, and pair it with a wide-brimmed sun hat that shades your neck, not just your face. A high-SPF sunscreen belongs in your day bag, not buried in the tent, so you can reapply after swimming or sweating.
Even in the warmest months, evenings can surprise you. In alpine regions, night temperatures can drop below 10°C even in July and August, so a light fleece is worth the small amount of space it takes. Throw it on for dinner on the terrace, a campfire session or the walk back from shared facilities, and you will stay comfortable without needing heavy cold-weather gear.
Water is a big part of summer glamping. Many sites sit near lakes or rivers, and a good number of summer-focused resorts have on-site pools or natural swimming spots. Pack a swimsuit and a quick-dry towel so you can take advantage without lugging damp cotton around your bag for days.
- Reef-safe sunscreen: if you plan to swim in lakes or rivers, a reef-safe formula protects the water and your skin; bring a small stick version for easy reapplication on your face.
- Sunglasses with a strap: a simple cord keeps them secure on boat trips, paddleboards or windy ridge walks, where a loose pair is easy to lose.
- Light-colored clothing: pale fabrics reflect sunlight and stay noticeably cooler than dark ones during midday heat, so favor light shades for daytime pieces.
- Flip-flops or sandals: useful for pool decks, shared shower areas and letting your hiking shoes dry out between walks.
- A clip-on fan or cooling towel: safari tents and domes can warm up quickly in direct sun, and a small cooling item makes midday naps far more pleasant.
Autumn and Winter Glamping: Cold-Weather Packing
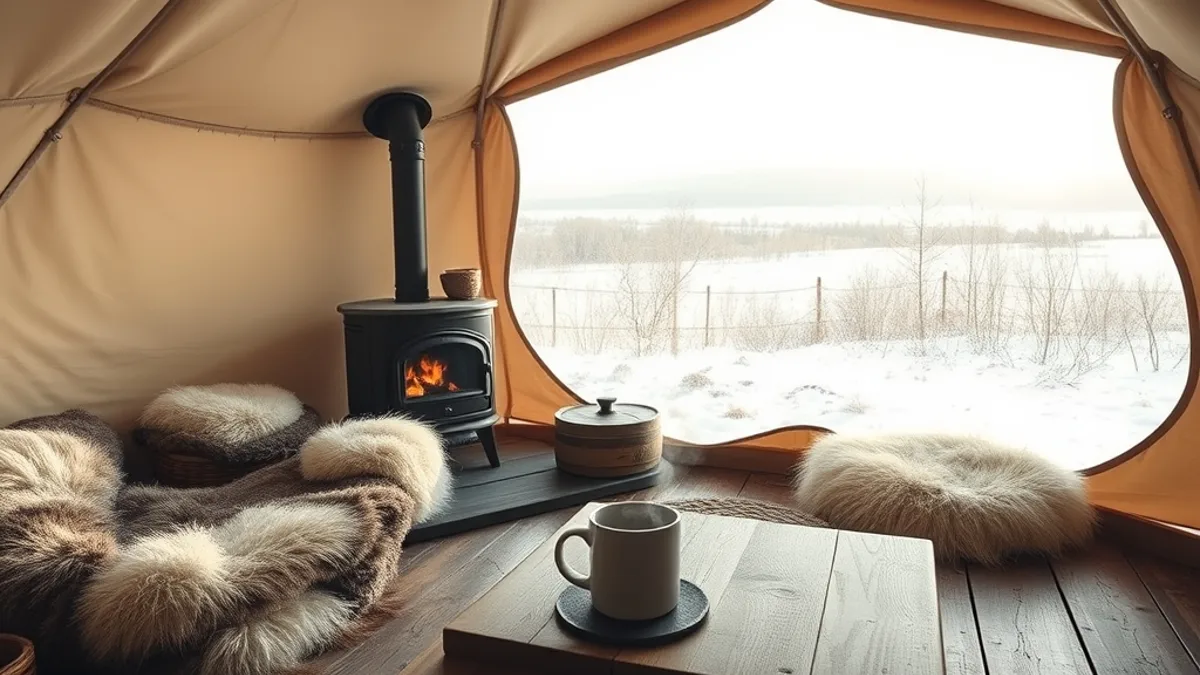
Cold-weather glamping is a different beast from the summer version. Winter sites typically operate November to March with heated tents or wood stoves, which keeps the inside cozy, but you will still spend plenty of time outdoors walking to bathrooms, fire pits or the dining lodge. That means your packing priorities shift from sun protection to insulation and wind blocking.
Start with your layers. Thermal base layers are non-negotiable, and insulated mid layers such as a fleece or light down jacket do the heavy lifting once the sun drops. A windproof outer shell matters more than a waterproof one in winter, since biting wind strips heat faster than drizzle ever will. If you already own the pieces from the 3-2-1 clothing system, simply swap in warmer versions of each.
The gap between tent and facilities is where most people suffer. Heated accommodation is wonderful, but a two-minute walk across frosty grass in sneakers will ruin an evening fast. Wool socks, insulated boots and a beanie should go in your bag before anything else. Gloves count too, especially if you plan to sit outside stargazing or tending a fire.
Finally, think about your skin. Stove-heated tents and freezing outdoor air dry it out quickly, so moisturiser and lip balm earn their place in your wash bag. A small tube of hand cream in your jacket pocket gets used more than you would expect.
- Thermal base layers (top and bottom): merino or synthetic again, worn under everything for daytime walks and as sleepwear on frosty nights
- Insulated boots with grippy soles: frosty paths and gravel turn slippery, so tread matters as much as warmth
- A buff or scarf: tucks into your shell jacket to protect your neck and face on windy mornings
- Thick wool socks, at least three pairs: damp socks from snow or condensation take a full day to dry indoors
- A hot water bottle or insulated flask: many sites allow them, and a warm drink at the fire pit stretches your outdoor time considerably
Layering System: How Much Clothing to Bring
A simple layering system saves you from overpacking while keeping you comfortable from a chilly morning coffee to a warm afternoon hike. For trips of 3 to 7 nights, follow the 3-2-1 rule: three base layers, two mid layers and one outer shell. That combination covers most weather you will meet in spring, summer or autumn without filling your bag with outfits you never wear.
Fabric choice matters as much as quantity. Merino wool and synthetics wick sweat and dry overnight, while cotton holds moisture and loses its insulating power once damp. A cotton t-shirt that gets wet on a morning walk can stay clammy all day, even in mild weather.
Do not forget the evenings. Many upscale glamping resorts have an on-site restaurant or lounge where guests dress up a little, so plan one smart-casual outfit for dinner. A collared shirt or a simple dress takes almost no extra space and means you will not feel out of place.
Here is how to build each layer of the system:
- Base layers (three): Choose merino or synthetic tops and bottoms worn against the skin; merino resists odor, so you can rotate them across several days without washing.
- Mid layers (two): A fleece and a lightweight insulated jacket work well together, letting you add or remove warmth as temperatures shift between day and night.
- Outer shell (one): A waterproof, windproof jacket is your single most versatile piece, shielding both the mid layers and you from rain and gusts.
- Evening outfit (one): Keep a folded smart-casual set in its own packing cube so it stays clean and wrinkle-free, separate from hiking clothes.
Booking Timing and Choosing Your Site Before You Pack
Glamping is popular enough that the best sites fill up fast. For peak season trips between May and September, aim to reserve your stay 3 to 6 months in advance, especially if you want a specific tent, dome or cabin with a view. For shoulder dates in April and October, booking 1 to 2 months ahead is usually enough, though weekends can still go quickly.
Ask for a packing list at booking
Amenities vary a lot between accommodation types. A safari tent with a full kitchen is a different proposition from a geodesic dome with just a wood stove, and a solid-walled cabin sits somewhere in between. When you book, ask the operator for a packing list and a clear rundown of what is included. Most sites provide bedding and towels, but the extras — cooking equipment, firewood, hot tub access — are far from guaranteed, and knowing what is missing shapes what goes in your bag.
One detail matters more than almost any other: bathrooms. Some glamping sites offer en-suite facilities in every unit, while others rely on shared bathroom blocks a short walk away. If you are walking to a shared block, pack a small toiletry bag you can carry in one hand, plus an extra towel and a pair of slip-on shoes for the trip. With an en-suite, you can afford to bring less and keep everything in one place.
Finally, check the site’s cancellation and weather policies before you pay. Mountain and coastal sites occasionally close units in poor conditions, and a flexible booking makes a packed bag far less stressful.
Pack Light, Camp in Comfort
Glamping takes care of the roof over your head, but knowing what to bring can still feel like guesswork. The good news is that a seasonal checklist does the heavy lifting: start with the year-round essentials, add weather-specific layers for the season you are traveling in, and stick to the 3-2-1 clothing system for trips of 3-7 nights. That combination keeps everything in one soft bag instead of a stack of suitcases.
Before you zip it shut, double-check which amenities come standard at your chosen site, because a safari tent, a dome and a timber cabin rarely offer the same setup. A quick email to the host before departure also clears up any last-minute questions about what is worth bringing. Booking early helps here too: the further ahead you reserve, the more choice you have over sites and setups that match your packing style. If this checklist helped you plan your trip, leave a comment or share the article with a fellow traveler.